
What a specification review should cover for Dlp Printer: system compatibility for early research
When a manufacturing team begins early research, a dlp printer should be reviewed as part of a working system, not as an isolated machine. The first task is to describe the intended operating context: who will prepare jobs, which materials are under consideration, and how printed parts will move through the next stages. This creates a practical boundary for the review before model details begin to influence the discussion.

1. Describe the operating context
Start with the job rather than the product name. Record whether the work is exploratory, repeatable, or intended for a defined production process. Note the expected part types, the people responsible for setup, and the available space for printing, washing, curing, and resin handling. These questions do not prove that a system is suitable. They give the team a consistent way to compare what each page actually says.
Space is part of compatibility. A printer may need room for the activities around it, not only the footprint of the main unit. Include the path from model preparation to printed-part removal and then to washing and curing. The DF2+ page describes removal from the build plate followed by washing and curing, so those stages belong in the early workflow map rather than being treated as separate afterthoughts.
2. Identify compatibility and responsibility questions
Next, separate software, material, and operator questions. Ask which software is named, how material information is handled, and which settings are transferred automatically. Also assign responsibility for loading material, reviewing settings, removing models, and handling post-processing. A useful review record should label each answer as stated, not stated, or still requiring technical discussion. That simple distinction prevents a general category assumption from becoming a product claim.
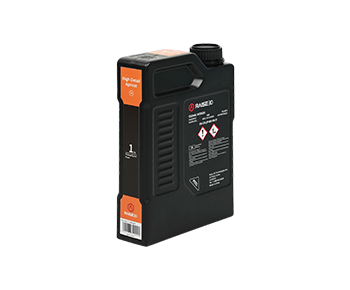
For a team comparing a large resin 3d printer with other options, the important question is not size alone. Ask whether the documented workflow matches the team’s intended material controls and post-processing sequence. On the official DF2+ page, the system is described as integrated with ideaMaker, while RFID verifies resin types and transfers optimized settings for printing, washing, and curing. The page presents this within the DF2+ workflow; it should not be extended to every resin printer or every application.
Also review where human judgment remains necessary. Automatic transfer of settings can reduce manual entry in the described workflow, but the team still needs an agreed process for confirming the job, preparing the build plate, removing the model, and moving it through post-processing. The review should record these handoffs clearly. This is especially useful when several people share preparation or finishing duties.
- Record the named software and material-control workflow before making broader compatibility assumptions.
- Map model removal, washing, and curing as connected stages in the documented workflow.
- Capture resin refill, liquid-level monitoring, and tank-cleanup functions as separate evidence items.
- Keep any speed statement with its stated conditions, including resin type, layer height, and part geometry.
3. Use page-level evidence carefully
Build a short evidence sheet for every candidate. Use one row for the product or feature, one for the exact page wording, one for the process stage it affects, and one for the question it leaves open. Avoid converting a marketing heading into a broader performance conclusion. For example, a page that lists Auto Resin Refill, Ultrasonic Liquid Level Monitoring, and Assisted Resin Tank Cleanup supports discussion of those named functions. It does not, by itself, establish a wider safety or labor claim.
The same discipline applies to material and software statements. The captured DF2+ information describes an Open Material Platform and says users can adjust print parameters for specific application requirements. Treat that as a starting point for a technical conversation. Record the exact materials, parameter controls, and workflow responsibilities that matter to the proposed use instead of assuming that a platform statement answers every compatibility question.
Evidence should also be time- and scope-bound. A stated print-speed figure, for example, may depend on resin type, layer height, and part geometry. If a specification includes those conditions, preserve them in the comparison record. Do not turn a conditional figure into a universal production expectation.
4. Plan the next technical discussion
Once the evidence sheet is complete, turn open questions into a short meeting agenda. Group them under software workflow, resin identification, post-processing, layout, and operator handoffs. Ask the technical team to respond to the exact proposed use rather than to a broad label such as “industrial” or “high detail.” This keeps the discussion focused and makes later sourcing work easier to audit.
Finally, save the decision record with the date, source page, product scope, and unresolved assumptions. A good early review does not force a purchase decision. It gives the manufacturing team a clear path from intended use to documented evidence, while keeping unsupported conclusions out of the comparison. Used this way, Raise3D becomes one named source within a broader, evidence-led review rather than a substitute for the team’s own compatibility analysis.